The stories of a hobby baker
No-Knead Bread, the New Baker’s Saviour

My quest for rustic homemade bread started when I was a teenager. I came across some hearty country loafs with a caramelized chewy crust and fell in love. But I lived in a place where bread was synonymous with soft and sweet buns reserved for afternoon tea (pineapple buns, anyone?).
I started experimenting with flour and yeast, but was soon intimidated by the difficulty of kneading dough by hand. Maybe I just didn’t have the muscles to pound the gluten out of the dough. So I got a bread machine, which handled the kneading job pretty well. Yet, my bread turned out to be dry, bland sandwich loaves at their best. To my disappointment, my parents would not help me finish them — they much preferred the sweet fluffy buns from the bakery around the corner. Eventually I gave up, thinking that the baking gods just did not like me. The bread machine became a dumpling dough machine.
Years later, when the pandemic just started, my housemate introduced me to the idea of “no-knead bread.” It promised to be the bread of my dreams without the mess of kneading dough, if I let it ferment in the fridge for a longer period. The photos in the recipe looked gorgeous: the bread has a golden crust, a soft centre, and many air bubbles.
Meanwhile, I noticed bread was disappearing from supermarket shelves, along with flour, yeast, sugar, pasta, meat pies, canned tomatoes, and toilet paper. After searching around three different supermarkets, I finally found some flour and sachets of yeast. I merrily drove home and jumped into my next big project. It was, of course, not as easy as I thought. The first challenge I ran into was shaping a dough with 76 percent hydration. I had no idea how to do this. The dough was a sticky, liquidy mess. I tried to roll the dough into balls, but they flattened out in minutes. Besides, our oven was a bit old (it was heated by flames at the back) and could only bake the bread at 210°C. So my bread came out with a dense centre and a soft crust in very odd shapes — they never expanded along the slits I made in them. However, they did smell and taste like proper bread this time, and that wheat-y fragrance turned the shabby kitchen into a happy little place. Smothering freshly baked bread with butter and Vegemite just brightened up my day.
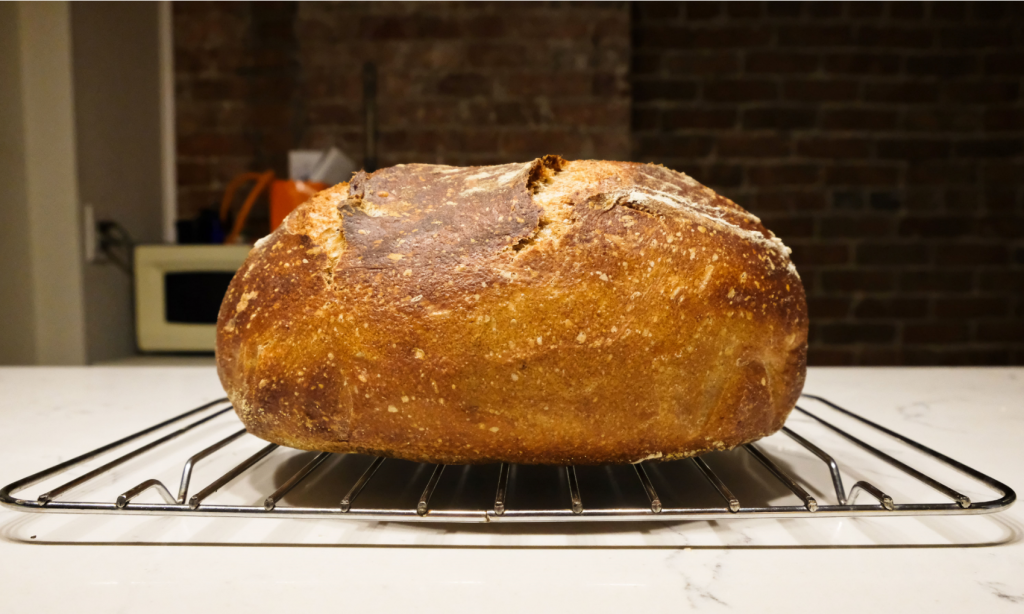
I kept making bread with the no-knead recipe for a few months. A two-day long cold fermentation seems to be the best practice for maximum flavour and gluten formation. Cutting down the hydration to 65 percent does not seem to have a discernible effect on the final product; if anything, this only saves me the hassle of scrubbing sticky dough out of my hands. More importantly, a good oven really changes everything — when I moved to a place with an oven that can maintain a high temperature (240°C), the structure and taste of the bread drastically improved. My bread still had funny shapes, but the inside started to look evenly “airy.” When my product became increasingly predictable, I started to look for the next thing to tinker with — a sourdough starter and naturally leavened bread.
From Starter to Bread
It seems that people have never been so interested in sourdough as they have since this pandemic. Many blog posts say that you can cultivate a sourdough starter in seven to ten days — most commonly seven. I suppose that’s because a week’s work does not look so daunting to beginners. But from my experience, seven days is really a stretch — you’ll need to do everything right in a suitable environment to get a functional starter in a week. And you’ll be extremely lucky (or grow your starter in too small a jar) to get that shot of a bubbly starter flowing out from the jar in a few days’ time. A very energetic and overflowing starter is the starter’s equivalent of the Instagram-perfect body; so don’t be discouraged if your starter doesn’t have it.
It took me two attempts to successfully grow a starter. The first time around, I followed a seven-day starter recipe and used whole-wheat flour and bread flour as directed. For some reason I thought tap water would do just fine, and that was probably a fatal mistake. My starter had some bubbles for the first week, but it never rose and the bubbles declined over time. Two weeks later, the bubbles disappeared and the starter began to take on a strong, foul smell, like nail polish remover. There could be many reasons for this, but the common wisdom is that the starter failed to form well. It turns out that tap water in Toronto is treated with chlorine, which inhibits yeast growth.
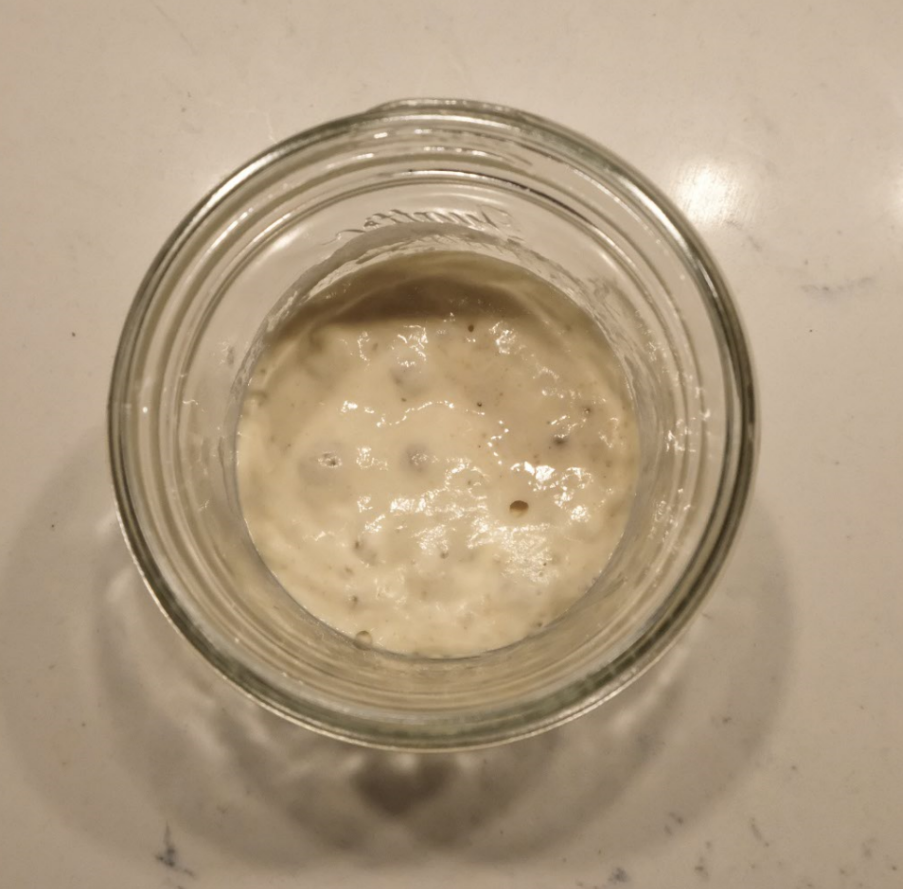
As a result, only harmful bacteria thrived in the jar. So I poured out the spoiled starter, consulted a few more recipes, and started over. Many recipes call for a big glass jar and about 100g of flour per feeding. But that also means that you will need around 2kg of flour just for cultivation and will have to discard most of it before the starter stabilizes. If you want to reduce waste, the practice of using a smaller jar and less flour may be worth a try, especially when you are just starting out. With distilled water and a mix of 10 percent rye flour and 90 percent white bread flour, my second try went pretty well, and it took about two weeks to stabilize in a kitchen that consistently measures around 21–23 degrees. My starter seemed to only be able to digest two times the flour in a 12 hour window, instead of three or four times as some bloggers wrote. Nevertheless, it picked up its own biological clock and rose and fell at the same time everyday. At this stage, my starter was ready to go and the discard could be saved for scones and pancakes.

Unlike most advice to refrigerate starters and refresh it every week, I keep my starter on the counter. The main reason is that it takes one to two days of room temperature feeding to bring a refrigerated starter to usable vitality, and I bake quite often. If you maintain a very small starter at room temperature, the amount of flour you need is no more than what’s needed for refrigerating a larger starter and refreshing it every week. Room temperature also allows the starter to grow stronger over time. I feed my starter once everyday: I discard all but three to five grams of starter and add three to four times the amount of flour and distilled water. A 200ml jam jar will be the perfect home for the starter. Also, the discard saved from feeding the starter keeps very well in the fridge; I make a batch of sourdough pancakes out of them every two weeks and freeze the rest for easy breakfasts.
When I need to make bread, I keep all the starter and ramp up the flour at feeding, and some hours later I’ll end up with a bigger batch (~170g) of mature starter, enough to bake two big loaves plus a bit to maintain it. Adding other types of flour, particularly rye flour, may speed up the maturing process and add a hint of sweetness. Around 30 minutes before using the starter, I mix all the flour and most of the water for the bread, and set the mixture aside. Once the starter is mature, I fold most of it into the flour-water mixture, leaving the rest behind to keep it going. Then, I incorporate some salt with the remaining water, and proceed the same way as making bread with commercial yeast. The simplest recipe doesn’t require kneading: stretching and folding the dough in the bulk fermentation phrase followed by a long, cold second fermentation will do the trick. Using a dutch oven or combo cooker to bake the loaf increases its volume and creates a chewy crust.
There are many variables in the baking process, but homemade bread is not rocket science. Slight recipe modifications won’t ruin the final product, but they will yield different results in nuanced ways. A starter freshly matured imparts a different flavour on the bread than a starter past mature for two hours. I’ll never know exactly what I’ll get in the next batch, and I guess that’s the fascinating thing about home baking.


